Making a SUPER COOL Saturn V Rocket for Kids
Have Fun Creating While Learning!
Making your own toys can be really satisfying and a lot of fun to do together with your parents, kids or friends! You learn new skills while making something you’ll enjoy playing with for hours. Making a toy rocket is also a great idea for a school science project! Continue reading below, and check out the pictures, for all the items you’ll need and the steps to follow to make your own Saturn V Rocket!

Making Your Own Toy Saturn V Apollo Moon Rocket
My nephew loves everything related to Space and Astronomy. He especially loves ROCKETS! So we decided to make one together out of leftover pieces of pipe and items we had lying around. Kids will enjoy helping to make the components; in particular painting the rocket! You can make one as well, with a few simple everyday items.
All you need to build your own Saturn V rocket are simple items you might be able to find around your home or as discarded offcuts from a hardware store. You will, of course, need some tools and a selection of paints. Anyone can make this rocket whether at home or school.
The items you'll need (as the pictures below show):
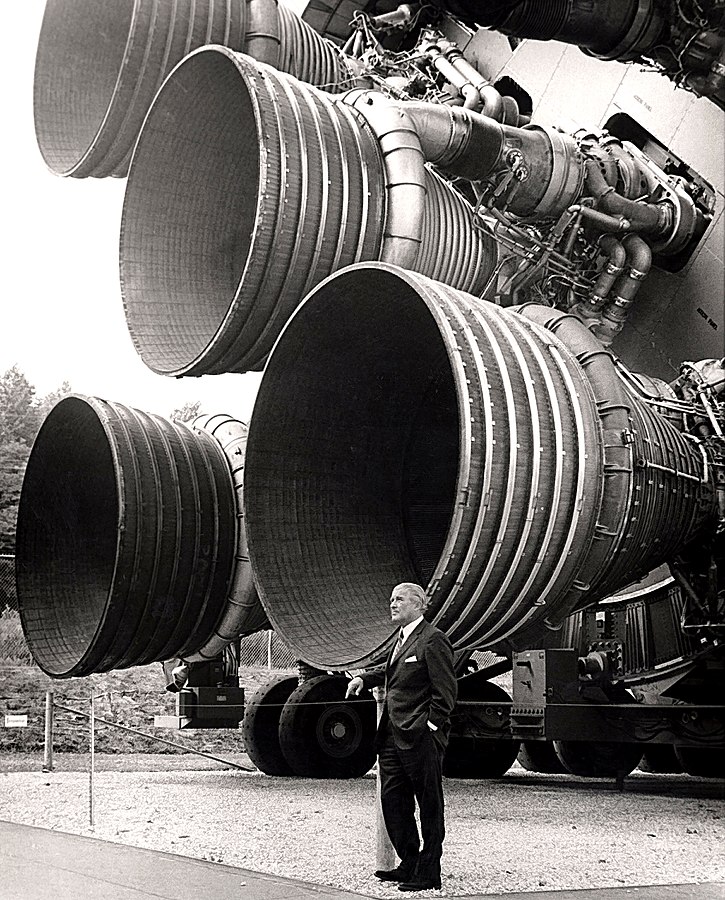
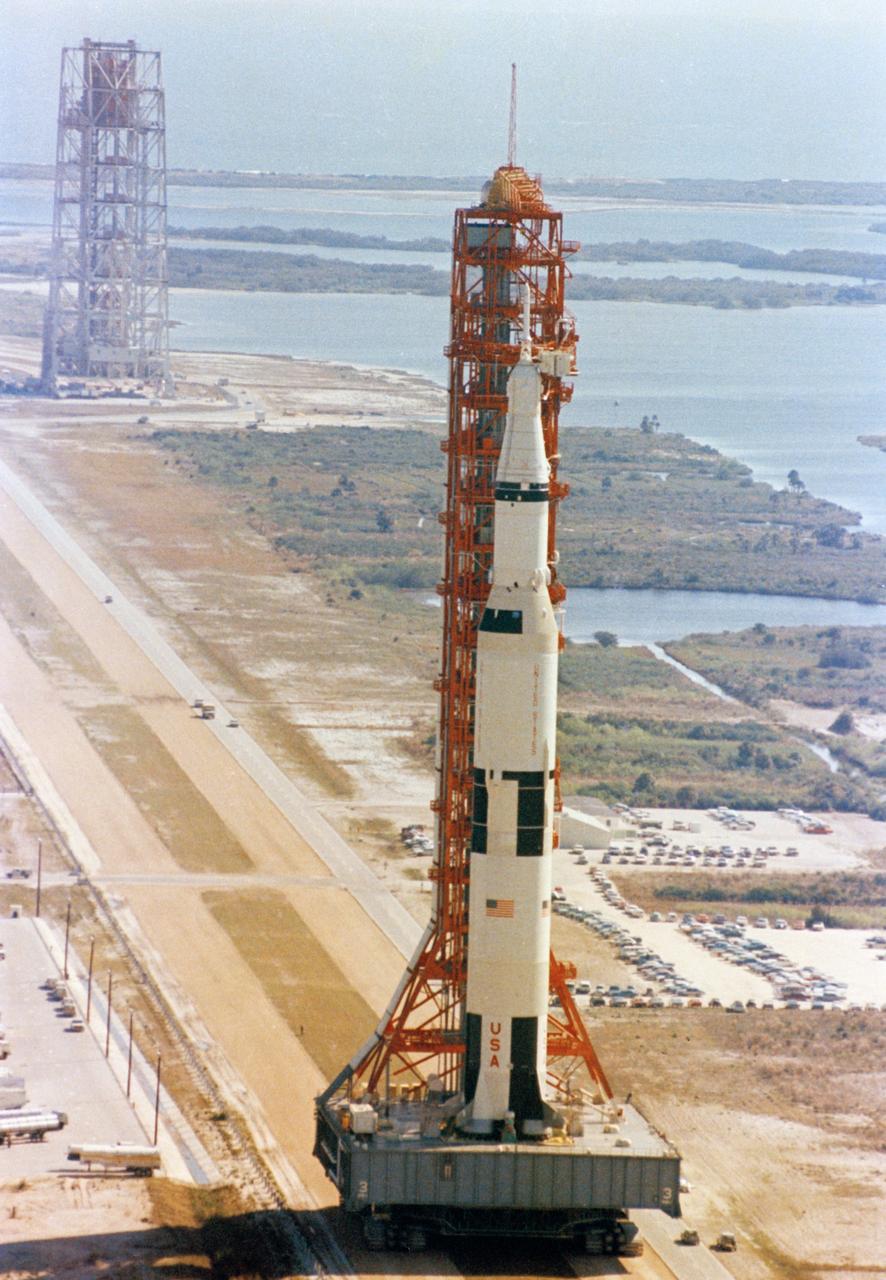
- A picture of a real Saturn V as a useful reference
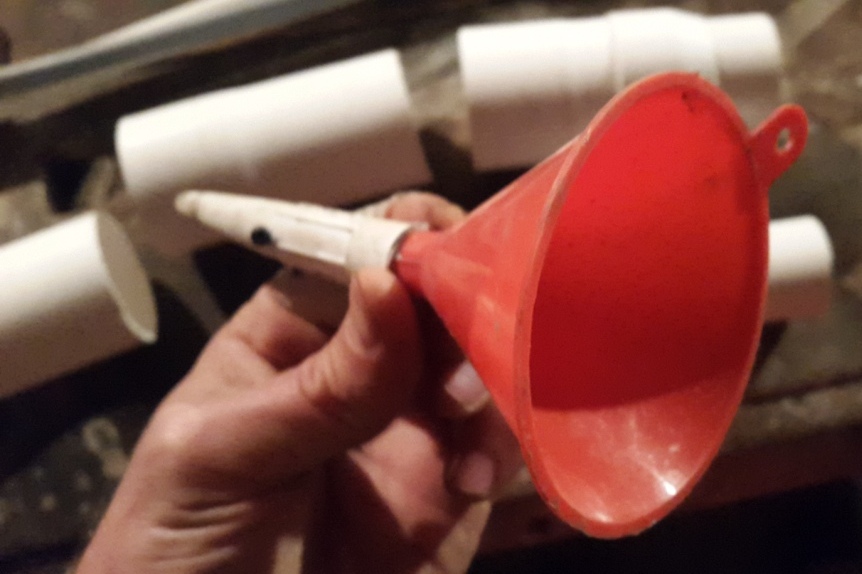
- A small funnel
- Glue (I used thick and sticky silicone glue)
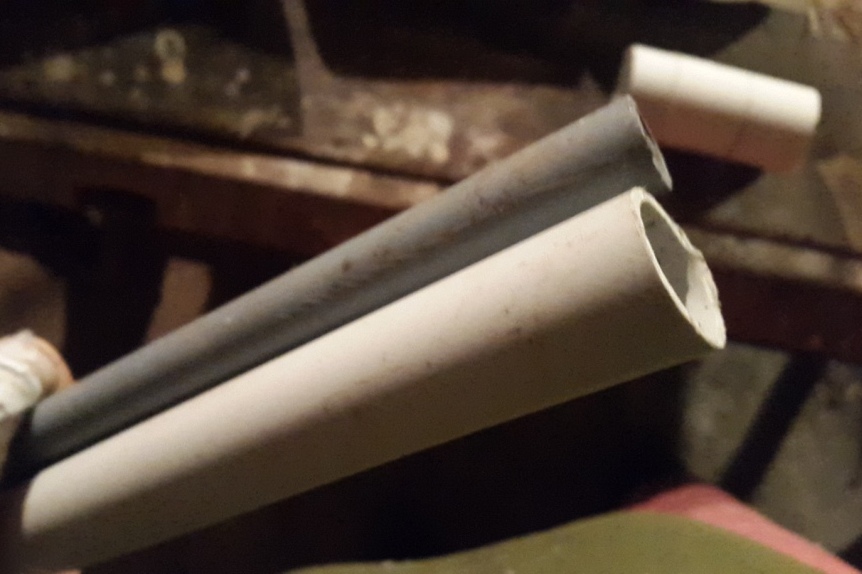
- A 30cm long piece of small diameter pipe
- A 0.5m long plank of wood at least 10cm wide by 3cm thick
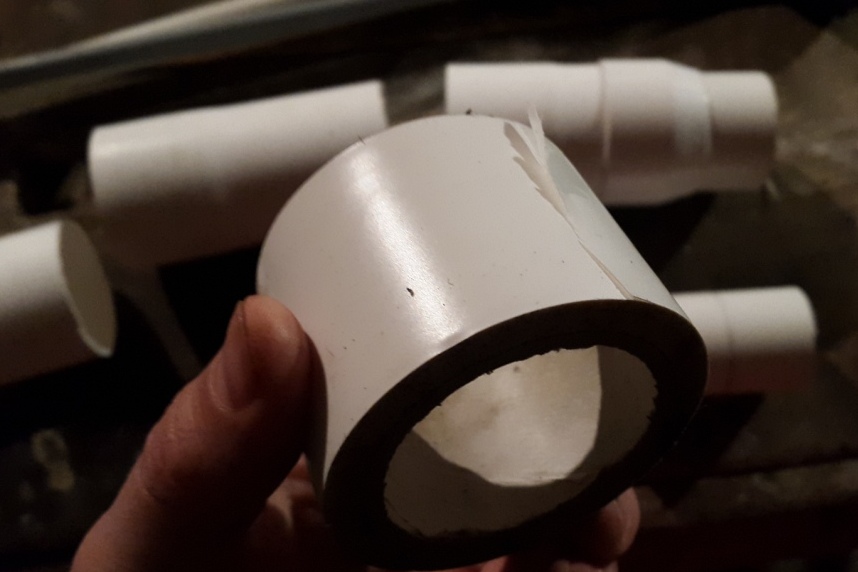
- Three short sections of plastic drain pipe (approx 7.5cm in diameter (3” inch), ideally the end pieces which neatly slide together
- A smaller section of pipe about 5cm (2” inch) in diameter
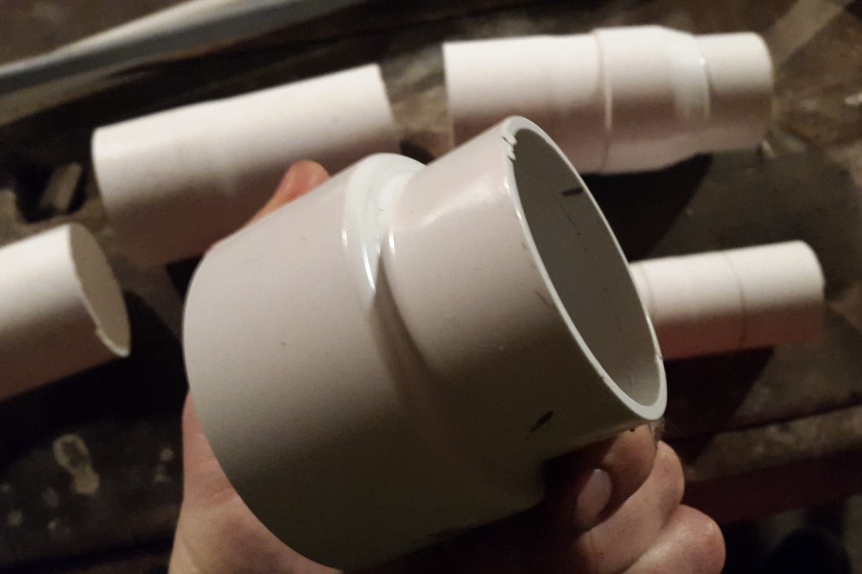
- A downsizer from the larger diameter drain pipe to the smaller pipe size
- And a roll of tape may come in handy
- Small screws
- And some paints; white, black, red and grey!
The tools you’ll likely needs are;
- Kraft knife (be careful!)
- A saw
- A file & rasp
- Electric drill and drill bits
- Screwdriver
- Paintbrushes

Instructions on how to make a model toy Saturn V rocket
Now it’s onto the fun part of making the rocket. I estimate this may take you 10 – 15 hours, so you can easily complete this project over a week or busy weekend.
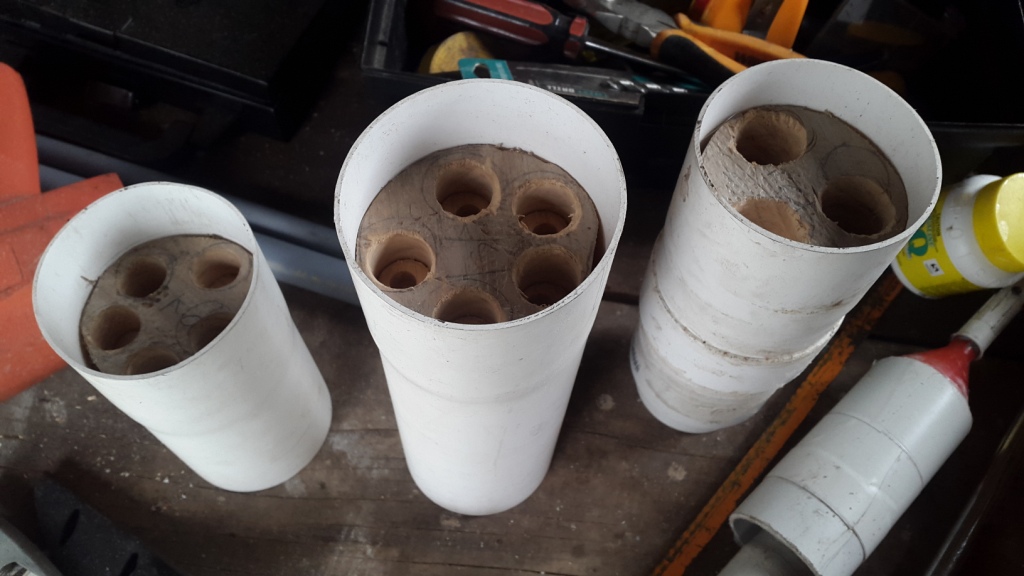
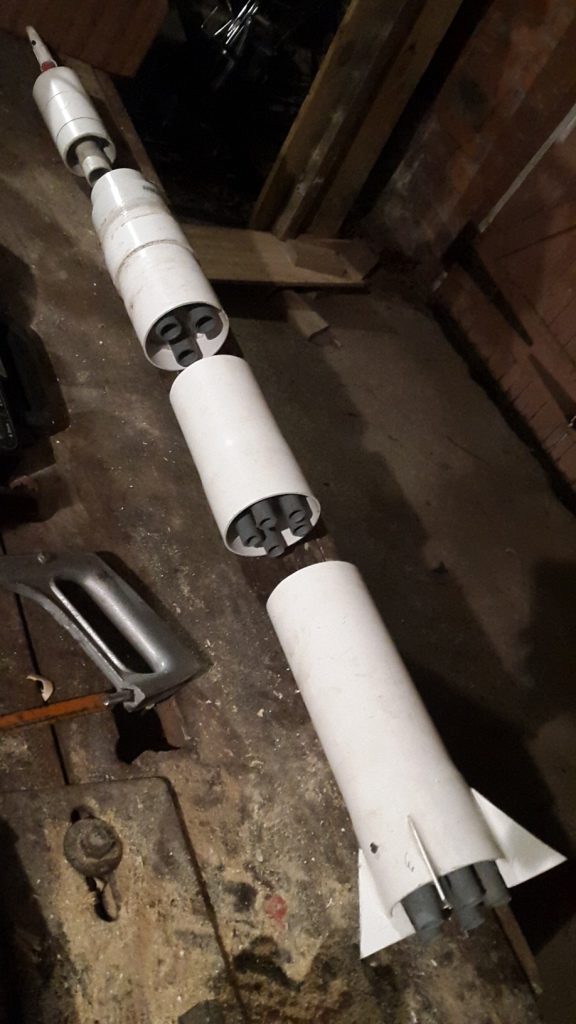
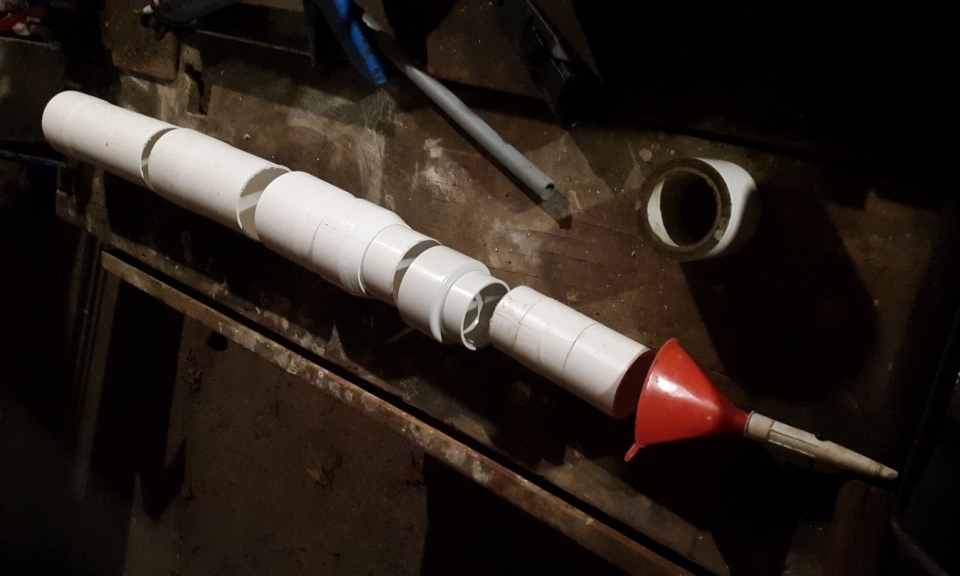
Step 1: With your picture of the real Saturn V to guide you, cut the large diameter drain pipe into 3 approximately equal lengths, around 15-20cm long. By looking at your picture of the Saturn V you should be able to approximate proportions based on the size of pipe you’ve chosen. These will make up the 1st, 2nd and 3rd stages of the rocket. These should all fit together as drain pipes often connect to one another (as one end is larger than the other to enable this). If they do not, you will need to find some connectors to fit the pieces together.
Step 2: Cut the smaller piece of ~5cm diameter pipe into a length of about 10cm long. This will become the Service Module (SM) near the top of the rocket.
Step 3: Ensure that the rocket stages fit together and that the downsizer section (a type of rocket interstage) fits both the larger and smaller diameter pipe. You should be able to stack the sections of pipe together now and have them stand up.
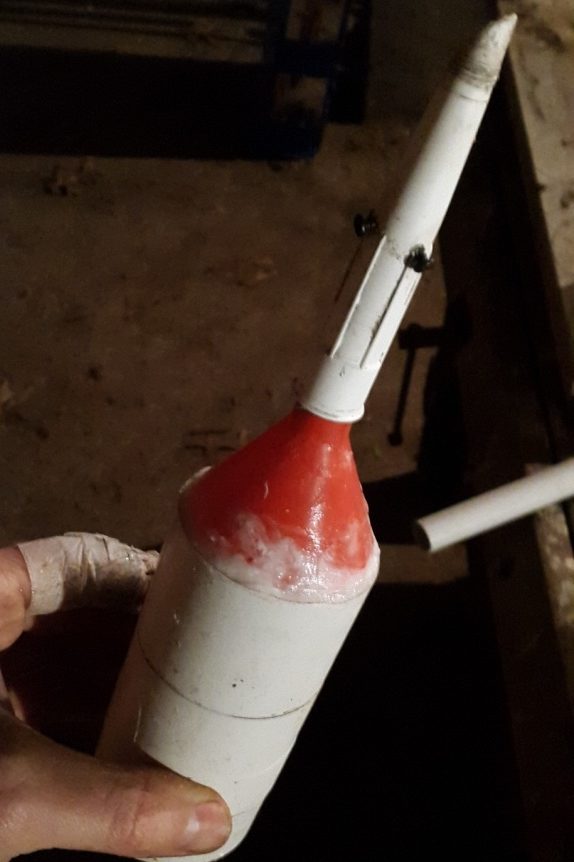
Step 4: Next use the funnel to replicate the Command Module (CM) which sits on top of the SM. If your funnel is a larger diameter than the pipe used for the SM then this is fine, you will just need to make a series of cuts around the edge of the funnel to bend the edges in so that it will slide inside the pipe. Glue this in place.
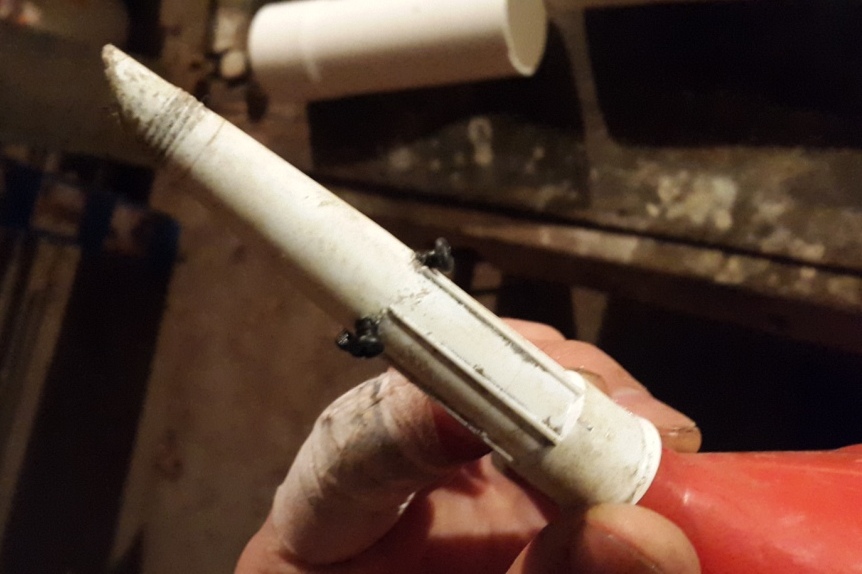
Step 5: Glue your tower spire onto the end of the funnel’s spout. I used the end of a silicon glue gun for this purpose, but you may find or have made something even better!
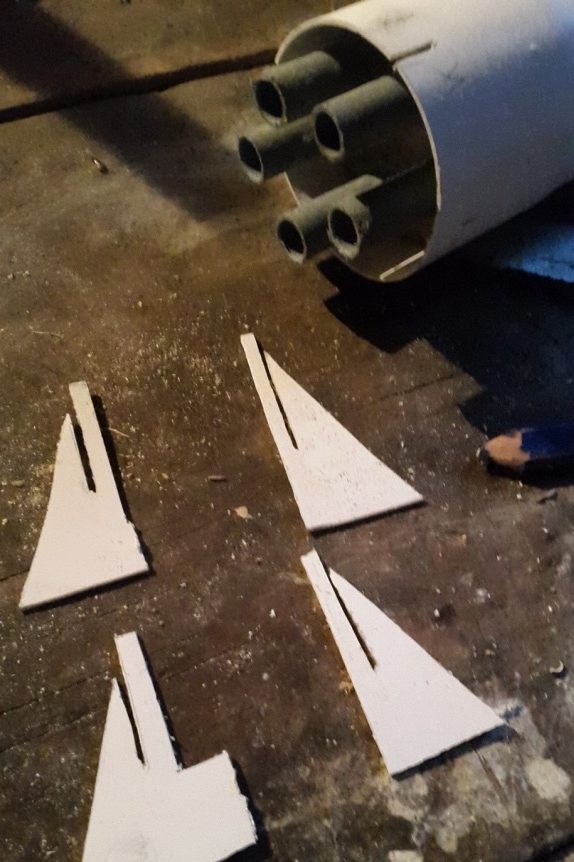
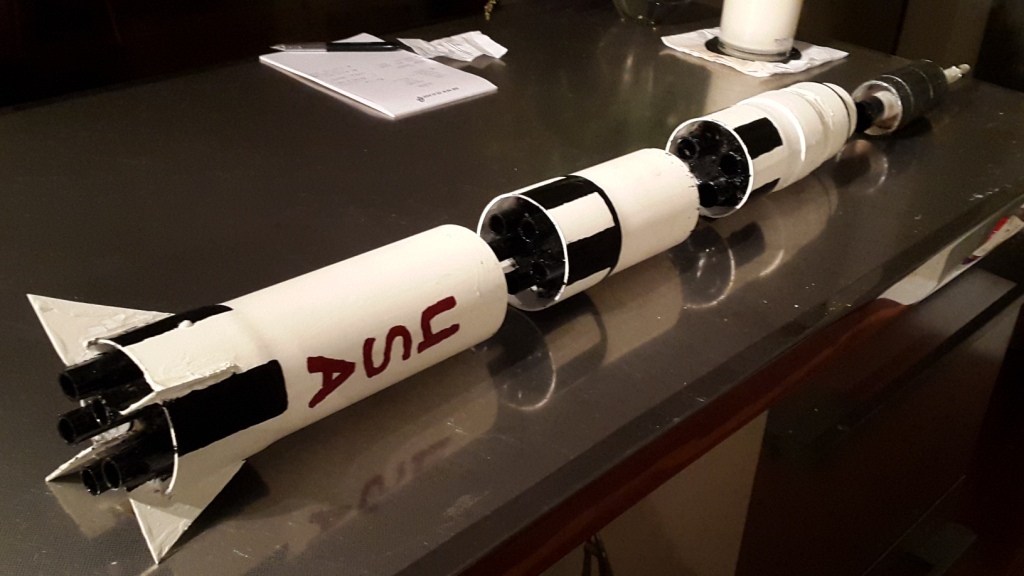
Step 6: The rocket engines are going to be made of simple plastic (or you could make them of metal pipe) pipe, as once they are painted, they will look like the bottom of a rocket engine! Cut your small diameter pipe into pieces about 5 cm (2” inches) in length. I used 5 for the 1st stage, 5 for the 2nd and 3 for the 3rd stage. This is similar to the actual Saturn V rocket!
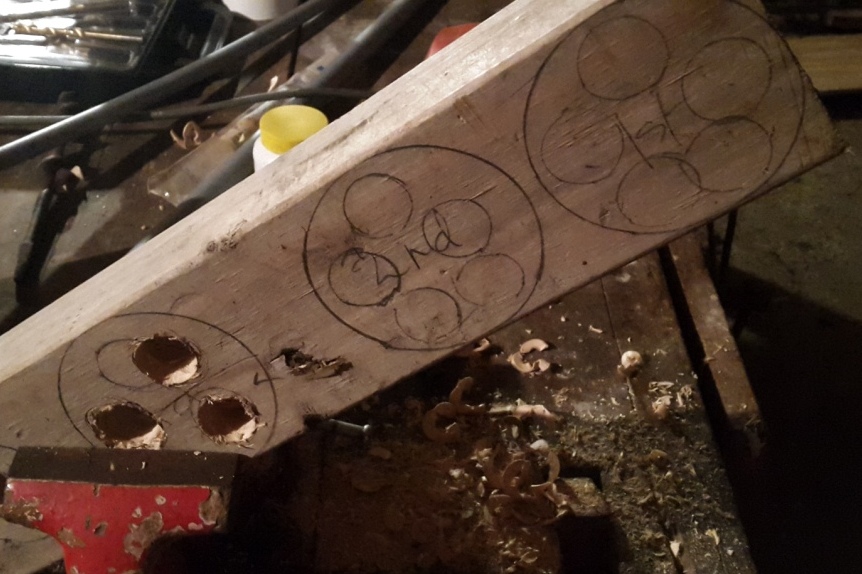
Step 7: Now is the time to prepare your rocket engine mounts. This part is kind of optional, as you could make a perfectly good toy rocket without the rocket engines, but I think it looks much better with them! Take your block of wood, mark out the diameter of the pipe and position of the rocket engines (as shown in one of the pictures below) and place it in a vice.
Step 8: You need to first drill out a hole for the small sections of pipe (the rocket engines) to be glued into before you proceed to cut out the round blocks which should slide inside the large diameter pipe (the rocket stages).
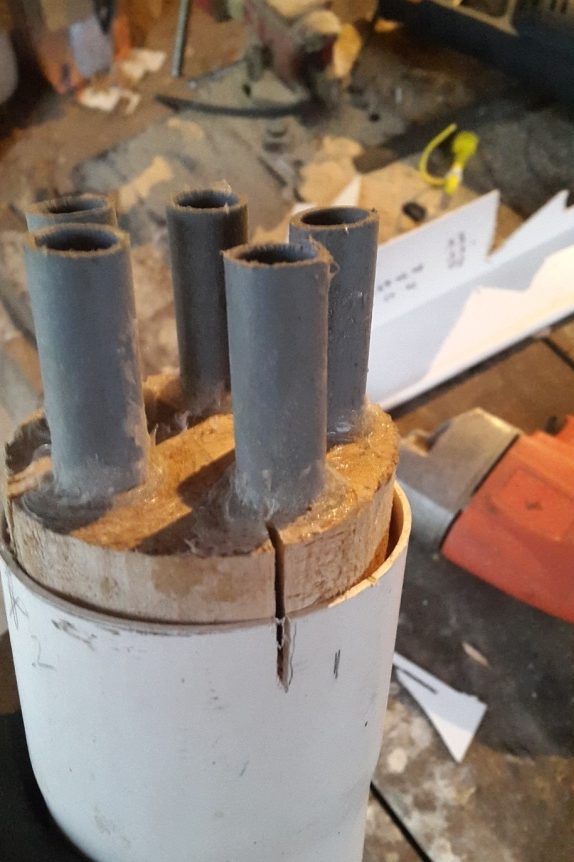
Step 9: Glue in the short pieces of pipe (rocket engines) into the holes of the wooden rocket mount.
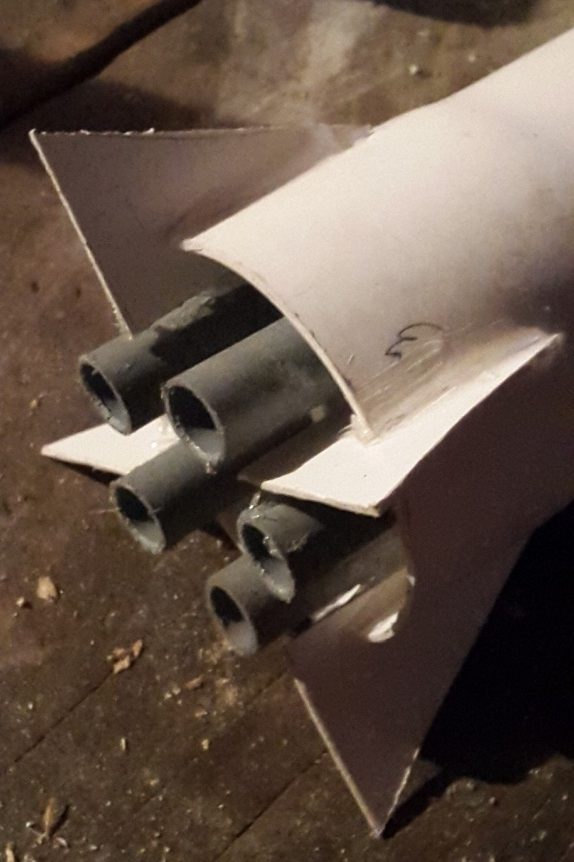
Step 10: Slide the rocket mounts into each stage of the rocket and glue (or screw) into place so they cannot move.
Step 11: The base of the Saturn V’s first stage had fins, so the next step is to cut out 4 equally sized fins and fit them to the base of the 1st stage. Glue them in place. I made these protrude beyond the rocket engines so that the rocket stands on them.
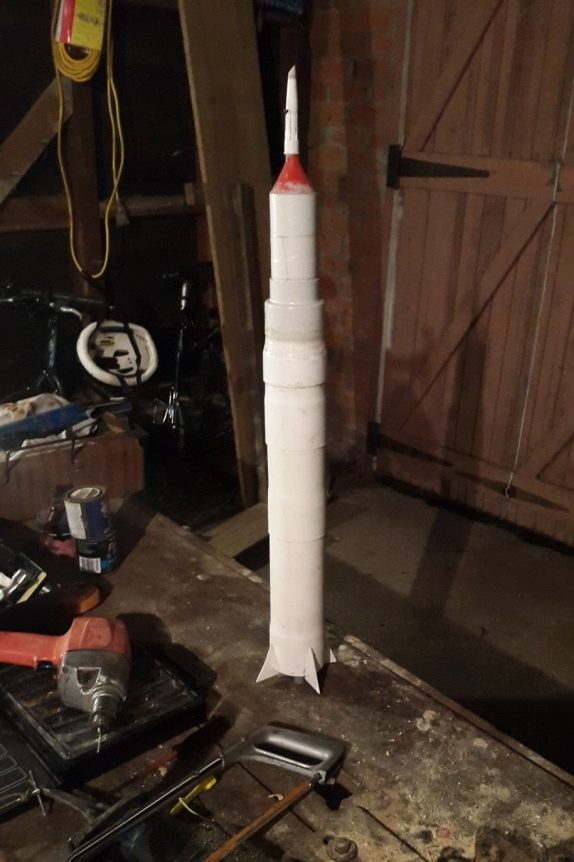
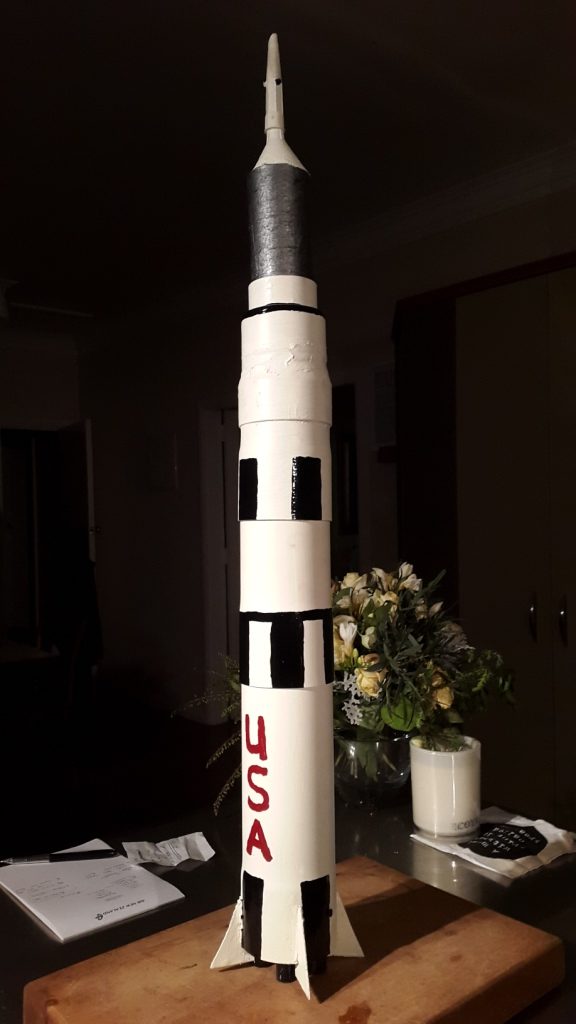
Step 12: Now fit all the rocket components together and once all the glue has dried, the rocket is ready for painting! I recommend a paint job similar to the actual Saturn V, mainly black and white, with a big red USA on the side!
And hey presto, you have your very own toy Saturn V Moon Rocket!